
Sooner or later, everyone faces a sudden loss of files. There may be various reasons for this. You can delete files on your own, or they can be corrupted. If you want to protect your important information from loss, you should have a clear picture of how to get back valuable data from PC, smartphones, recover deleted photos from SD cards, etc. Here are the most effective methods to restore the files you need. Can’t you find the photos from your birthday party? Check this list of best photo recovery tools and follow the tips below to get back files effectively.
Method 1: Restore Photos from Recycle Bin
Not everyone knows that there is a special folder on each hard drive where you can find files from the Recycle Bin. You should click on it and choose Properties. You’ll see the files that are available for recovery and will be able to select those you need. You can restore photos easily if you haven’t deleted them permanently using Shift + Del. The method with Recycle Bin will work effectively if the photos have been removed to the Recycle Bin and are still there. Take this into account when using this recovery method.
Method 2: Try to Get Back in Time and Restore the Previous Version
If you use Windows, you should check the history of files. The system has a feature that makes it possible to recover the previous version of the file. As for Mac, there is a Time Machine that also helps get back in time and recover files. To get access to File History, you need to enter the Control Panel. Take into account that your external hard drive should be mentioned among the locations of the file history.
Choose the folder where your photos or other files were located and enter the tab with the previous versions. For this, you need to choose Properties. Choose the version you need and recover it.
Method 3: Use Professional Recovery Tool Disk Drill
Have you tried the methods described above, but they didn’t show any result? Then, you should use Disk Drill – an expert in fast photo recovery. It’s a very user-friendly program that can be used by beginners and professionals.
No special knowledge or skills are needed to get back data with the help of Disk Drill – reliable photo recovery software. There are several simple steps everyone can take as they are fully intuitive.
- Download Disk Drill photo recovery software and go to the installation process. It is a free recovery tool that can be downloaded from the official website without any hassle. You should choose the necessary system (Windows or Mac), and proceed to the download.
- The next step is the connection of your hard drive.
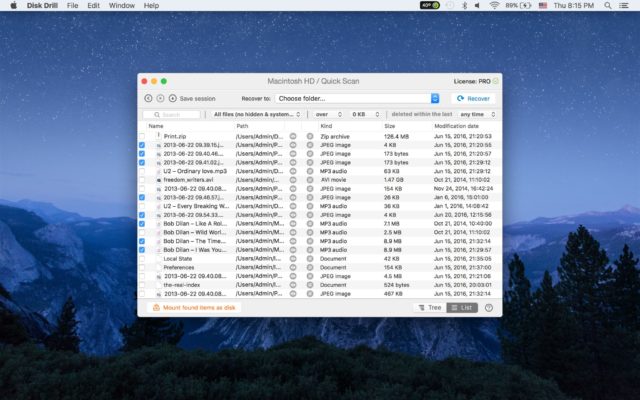
- After this, start searching for the photos you’ve lost. For this, you need to use the button “Search for lost data.”
- Preview the files and select those you want to get back.
- Press the button “Recover,” and that’s it.
The good news is that Disk Drill is a versatile recovery tool that can help you in any challenging situation. It’s one of the reasons why most consider it the best photo recovery software. It has a great option known as Recovery Vault. It helps prevent the loss of files if you activate the feature. If you install the free version, you will be able to recover up to 500 MB. In case you want to use unlimited possibilities of the recovery software, consider getting a paid option. It’s a good idea as you will always have a reliable program for data recovery by your hand.